Introduction to cold solder joint
When you are dealing with electrics, all it takes is a tiny connection to go wrong and send your work crashing to pieces. At the end of the day, though, these things all come back down to a simple truth that anything less is destined for failure. A cold solder joint is a common mistake made in electronics and many DIY gadgets. Understanding them might seem technical,l but now that we have the internet, learning about cold solder joints (and all things electronic) is a snap- who wants to be called an ignoramus?
This pesky electrical fault causes many a later headache as it bores into your workand cannot help but derail any electronic project. That unit made out of discrete components should function, but rarely does if solder joints are not warmed and cleaned before the PC. We would like to take a look at what causes this pesky problem and how you can spot–and correct–the errors before they upset your electronic projects.
Causes of

Cold solder joints can happen because of various reasons in the solder process. One main reason is that there has been insufficient heat application. When this occurs, the joint is unable to get up to a high enough temperature, a nd so solder flows incorrectly. The result is weak, poorly formed connections.
Moisture contamination also plays a huge part. If either the parts or the surface on which they sit are damp during soldering, it will create barriers to bonding,g and so there will be cold joints. A failure to bond properly can occur from movement as well, during subsequent cooling. Any vibration or shifting as the joint solidifies in place may lowerthe chances that a solid connection forms between components.
Signs of a
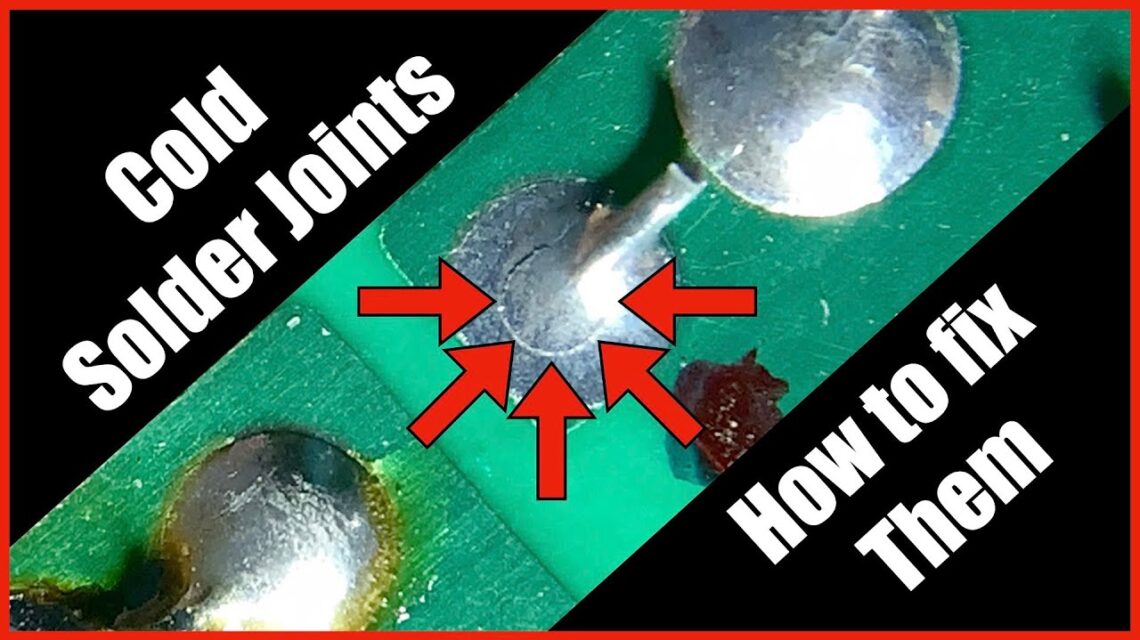
It’s difficult to find out just where the trouble is. Another clue is the spotty performance from your device, working away merrily for a time and then simply failing to get power at all. Appearance alone is enough to tell great. There’s no disguising a cold solder joint, which usually looks dull and granular on its surface compared with the bright, silvery sheen of an adequately-done job. If you see a crack in the contact or little spaces anywhere on it, chances are that’s where our culprit resides. Thrills up your back.
Do you hear anything? Sound also gives a clue. If electronic instruments produce odd buzzing or crackling noises, it’s probably because the connections are not perfect due to cold solder joints. If you’ve ever suffered from mysterious failures such as flashing lights or unpredictable mood swings in your circuit, now is the time to check closely for signs of this relatively common error: cold solder joints between printed circuit boards and sockets on motherboards.
How to Fix Cold Solder Joints
It is necessary to pay close attention to fix a cold solder joint, and be sure you have the correct tools for the job. The initial step is to find where this fault lies. Use a magnifying glass, perhaps, in order to see if any of the solder has not formed a good joint. Once you have located the problem, heat your soldering iron to the recommended temperature. Use isopropyl alcohol to clean both your iron’s tip and the area around the joint to remove any dirt or oxidation that might get in the way of a good bond.
Carefully heat up the old solder, and when it melts just enough for new lead-free replacement metal to be added (assuming that is what’s convenient for you instead), mix them together thoroughly. Ensure that they blend evenly in a firm bond across all of their joining surfaces. Finally, let everything cool down in the open air. It is absolutely important not to touch anything while it is cooling down, as this could cause more problems later. Examine again with a multimeter or visible inspection just to attest that conductivity has been effectively restored.
Prevention
To give cold solder joints the cold shoulder, you need a clean work area. Dust and debris can affect your soldering. Make sure that the components and the PCB are free of impurities. Do not skimp on the solder. Temperate materials can seriously affect adhesion and the risk of faults . Get rosin-core solder, which will not damage the flow of current.
When you use a soldering iron, the main consideration is control of temperature. Too cold, it doesn’t wet properly, too hot, and you could damage components. Take your time putting it together. In a rush, one often makes mistakes or malfunctions that may not be apparent for some time. The,n when they do become obvious, they are sure to prove fatal to your project. Take a good look over your work before bringing any piece of equipment into operation. A small effort now could save you a lot of trouble later on.
Conclusion
So why will cold solder joint continue to be a headache for electronic devices? Only by understanding what they are, how they happen, and the signs to watch for is it crucial to anyone working with electronics. Understanding the reasons for cold solder joints — such as not providing enough heat or not being careful enough as a soldering technician— makes it easier to detect when one has become faulty. Symptoms could be intermittent connections, unexpected responses to your machine, and so on.
Happily, repairing cold solder joints is not that complicated. So long as you have the right tools and practices, you’re able to correctly recover function. By carrying out soldering properly, this sort of problem can be savings is bad for any future electronics project in the future. With the problem of cold solder joints proactively solved, it is then possible not only toimprove one’s own soldering skills but also extend the life of those delicate components used in electronics. For hobbyists or professional technicians alike, how one treats information learned from this chapter could make the difference in future projects.
 transport block size Crucial Network Parameter
  onionplay.se: Works Perfectly for Streaming
  josh mojica net worth: Impressive Success Revealed
  Google Bruce Wayne: Must-Know Details
  nippyfile: Easy and Secure File Sharing